
Stitching is something that I don't really feel like I have the perfect answer. I've tried various methods, all being somewhat okay, but I haven't yet found that magic look. But I thought I'd go ahead and share one of my basic methods since it's easy and you never know, it might be just what you're looking for.
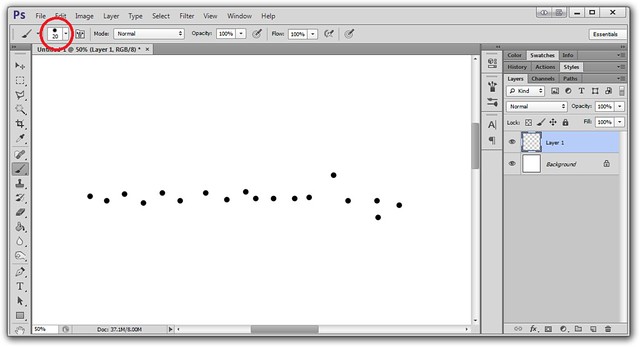
First I make the holes. You can make them as even as you'd like, but with this method I prefer it to be kind of messy and haphazard. I'm using a basic round brush at 20 px and I just made a bunch of random dots.
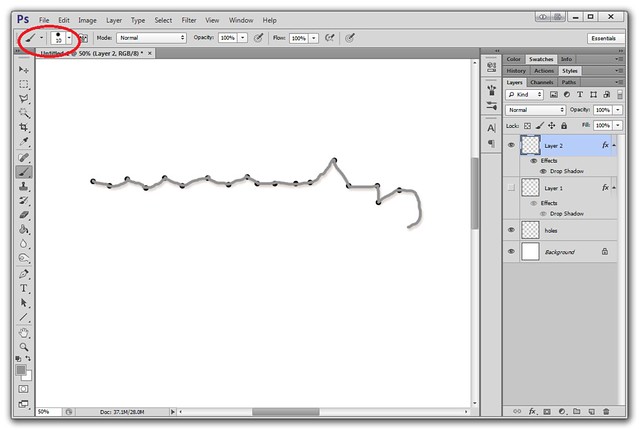
There are two methods I use to make the string. First I'll show you using the line tool.
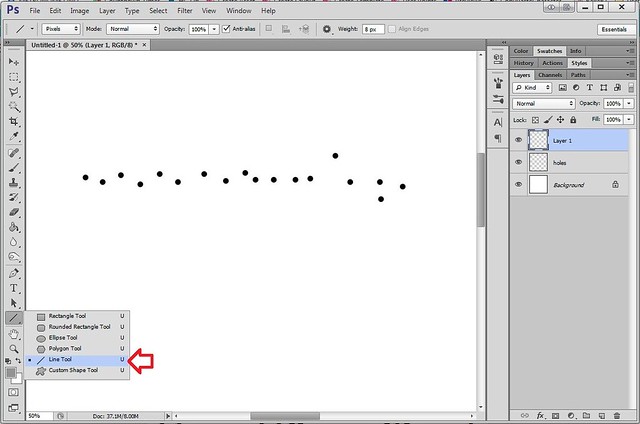
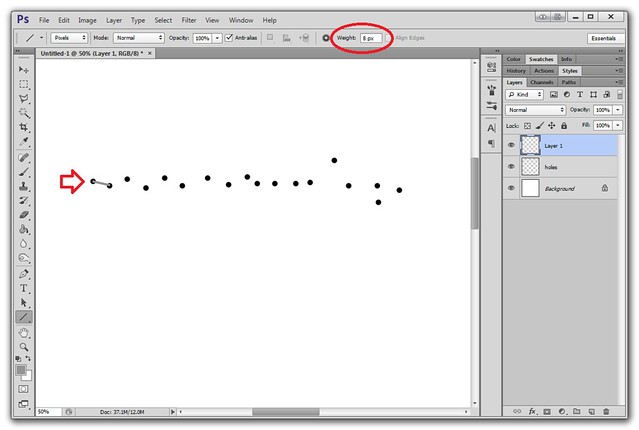
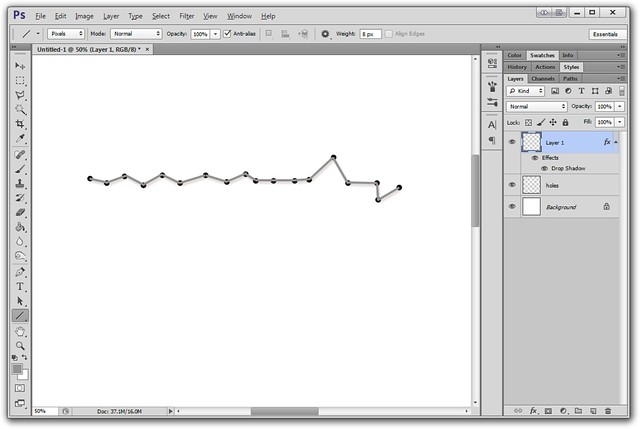
Make a new layer and using the line tool I just make small lines connecting the holes together. Here I'm using a line with a weight of 8px.
To finish up I usually just add a slight drop shadow, although you can also play around with a bevel and texture if you want it to look more realistic.
For the second method I just freehand it using the brush. This make for an even more haphazard look, which I find that I quite like. I use the same round brush as with the holes, but with a small diameter. And then just play connect the dots. I've added a small drop shadow to this layer as well.
Thanks so much for this tutorial!
Thank you~!
Neat trick, thanks!
Thanks Marisa, great tutorial!
Thank you!
Thanks! I'm learning so much through all of these tutorials! You've made a huge difference to my scrapbooking.
@ Marisa - Is there a standard texture that you like to use on your thread?
You make it look so easy. Bravo! I have never tried to make stitching myself, but earlier on in my designing I bought a style that made stitching out of any path. Soooo easy. But, yes, I do feel like it is cheating. xoxox Beth
@Sunny: I don't often put texture on the stitching...although sometimes I play around with the ones in Photoshop (Texture Fill).
I've done stitching using text along a path - like the underscore or hyphen or X - and then put the dots using a period. Then I add a shadow, etc. Its a little different in PSP since I don't have styles or textures, but it works out to about the same. I should learn how to do it in Photoshop. I have CS5, but I'm not all that comfortable with it. I'll have to check out some of the other tutorials here so I can get up to speed on my PSCS5.
Thank you for this tutorial, Marisa!
Thank you for the tutorial!
Thanks for sharing this!
And I suppose if you wanted the dots to look like holes, you could just use the hard-edge eraser in your top layer and click away.
Great tutorial - thanks so much. Now to practice!
Thanks so much! My first tutorial today and it's just what I was looking for.
Quite interesting and useful ... Thank you.
thanks! that's nice and easy
Great tutorial and you DO make it look easy. Thanks.
Thanks! I just enjoyed playing around with stitching after reading your great tutorial.
got to try this one. thx
Thanks so much for this one! I've been doing actual stitching on my cards and now I can put the needle down! My fingers thank you!
ooh, I really have to try this in PSP!!
Thanks for the tut!
Thank you for your tutorial. I'll give it a try.
thank you for this very usefull tutorial.
Thank you!
Another fun tutorial.thanks
This is great! I don't use any PS products but with many tutorials I am able to find the equivalent tools and follow your ideas. Just found this one and am looking forward to trying it! Thanks Marisa . . . you do make things look so easy!
Thank you!
I love the look of stitching but would never have thought of doing it this way! Thank you for sharing
Pages