
Thanks to Holly's pro tip after I wrote this, I've learned something new, so I'm updating this tutorial.
Check out this tutorial first if your not familiar with the gradient tool.
First, I've selected two of the colors I want to include in my gradient. In my case I've chosen the first and the last, although it doesn't really matter as you can change it later. Now, click on the gradient box.
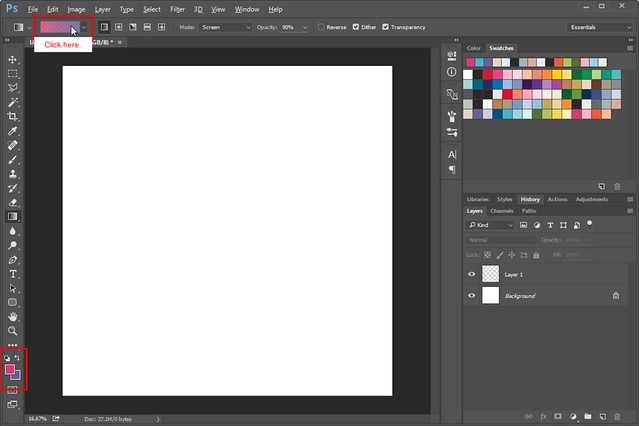
Clicking on the gradient box will open a window that will allow you to edit the gradient.
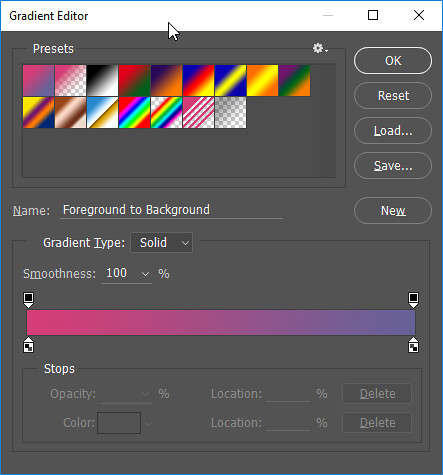
By clicking below the colored bar you can add a point. You can drag the new point to the right or left, and change the color by using the color box below (or select a color from your swatches panel).
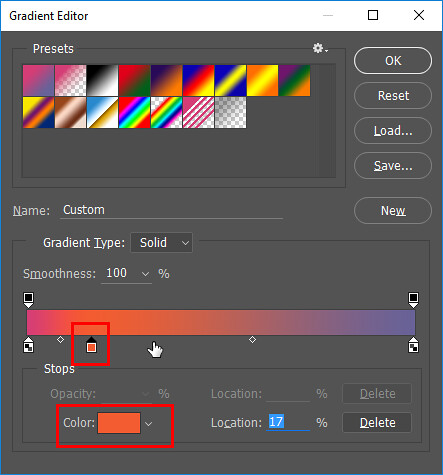
Keep adding points and adjusting until the gradient looks the way you want. Click OK to finish.

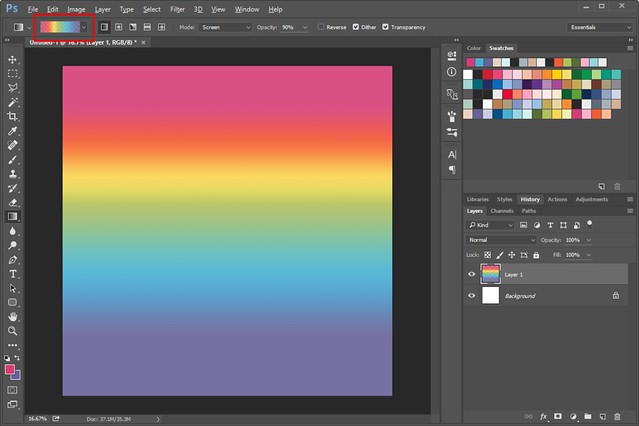
Now you'll see the gradient you made in the little box and all you need to do is select the layer you want and fill it with your new gradient! Keep in mind that the little icons next to the gradient box will use your gradient in different ways.

Marisa, there's an even easier way: you can add gradient points to the gradient and do it all in one. Anywhere you get to a screen that lets you choose a gradient from a dropdown menu, you can double-click on the gradient displayed (rather than on the down arrow) to pop up another window that will let you edit the gradient.
You'll have a selection of gradient swatches at the top of the window, and then another gradient below with little color-chip pointers above and below them. You can slide the existing pointers around, or click on one and then go down to the color chip at the bottom left and change its color to anything (click one of your kit color swatches to make it match). You can also click in an empty space below the gradient bar to add another color to it, and then set its color to your choice. Once you've got a gradient you like, save it with the New gradient button on the right. Bonus: you now have it permanently if you back up your gradients.
Yep! I use Holly's method, too. I rainbows and gradients (ombre)!
Tried Marisa's method, and it worked well. I don't really understand Holly's method, though.
Perhaps Holly's method would be better understood by reading about using the gradient tool at Adobe Support/Gradients.
Scroll down to the section heading of: Create a smooth gradient.
Yeah, Rose, it probably would. I'd have written up a proper tutorial with pictures, but my dog is having one of those weeks where I can't do anything for more than 3 minutes without him wanting attention...this is making cooking, cleaning, game night, and graphics work difficult to say the least!
Editing gradients like that can also make for realistic metallics, too, if you're inclined to play around with them.
Thanks for the tutorial!
I tried both methods and I must say it was easier to do it with Hollys method as you can this way get the smoothness right away.
I love the tutorials here so much, as I can still learn many cool stuff!
There's always something new to learn
Absolutely, and that's what's awesome about this community!
Very beautiful gradient
very helpful idea on how to make a gradient - thanks